How To: Upload Your Portfolio Projects
- Bridget Fedoruk

- Nov 3, 2023
- 2 min read
Updated: Sep 10, 2025
We've developed an entirely bespoke Portfolio for your IDCO template. It's the most technical page on your site, but this tutorial will walk you through how to auto-populate new portfolio projects + uploading individual category galleries.
ADDING YOUR PORTFOLIO PROJECTS

From your Wix editor navigate to the Content Manager by selecting the second to last icon on the left-hand menu
Select Manage Content
Select Portfolio
Adding your Portfolio Projects to the Database
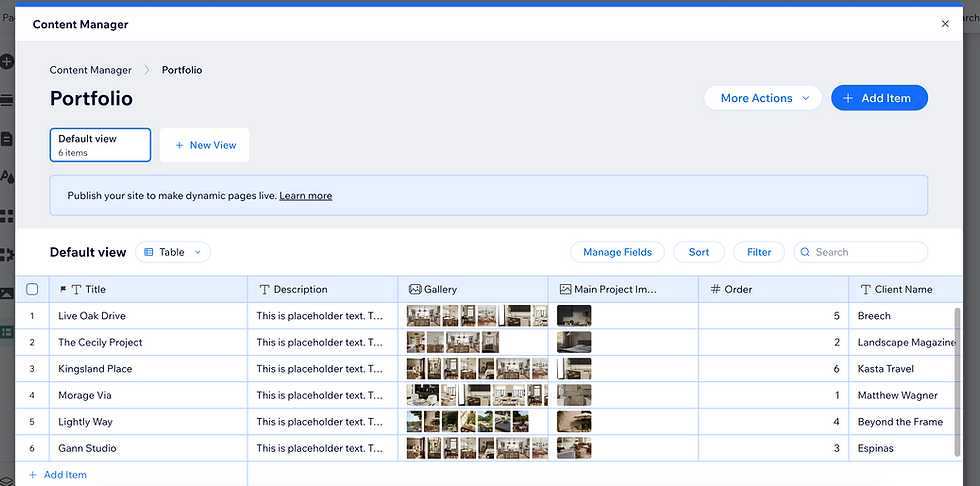
The portfolio page is set up as a 'template' for your portfolio project. Unlike the other pages on your site, each project will be updated in your database.
You'll see what looks like a data spreadsheet
The first few lines consist of placeholder projects so you can see how each project should appear
You can select each column and update each project with your project content

Click the cell under the Image column, a "+" will appear
Click the "+" to upload the primary (or featured) image which will show on the Portfolio Landing Page
Your photo gallery will appear for you to select the primary photo
Select Add to Page in the lower right corner to save your photo selection
Under the Gallery Column click the "+" to Edit Items

Click the orange Add Media button
In the top left corner, click Upload Media
Upload all of the photos for that specific project
To select more than one in your Media Gallery, hold Command + click
Click Add to Page
Drag and drop your images in the order you'd like them to appear on the individual portfolio page
Click Done
The additional columns will be filled in with your project details.
Leave the last two Columns as they are (the links auto-populate)
Rinse and repeat the steps above for all of your projects. Once everything is all set, you can Publish your site so your projects will be visible in your Editor!
Note: publishing your site will not make your site live to the public unless your domain is connected.
That's it! Feel free to email us at support@idco.studio if you get stuck.


